Hardware
This page describes the hardware of the OCRA console. All of it is available off-the-shelf. The essential components (the Red Pitaya and DACs)
retail for a total cost of less than $500.
We use OCRA with the MGH/MIT Tabletop MRI scanners.
In addition to the Tabletop MRI hardware, we use:
- The Red Pitaya STEMLab 125-14 board
- 3 AD5780 18-bit DACs
- A USB-controlled programmable attenuator (Minicircuits RCDAT-4000-120)
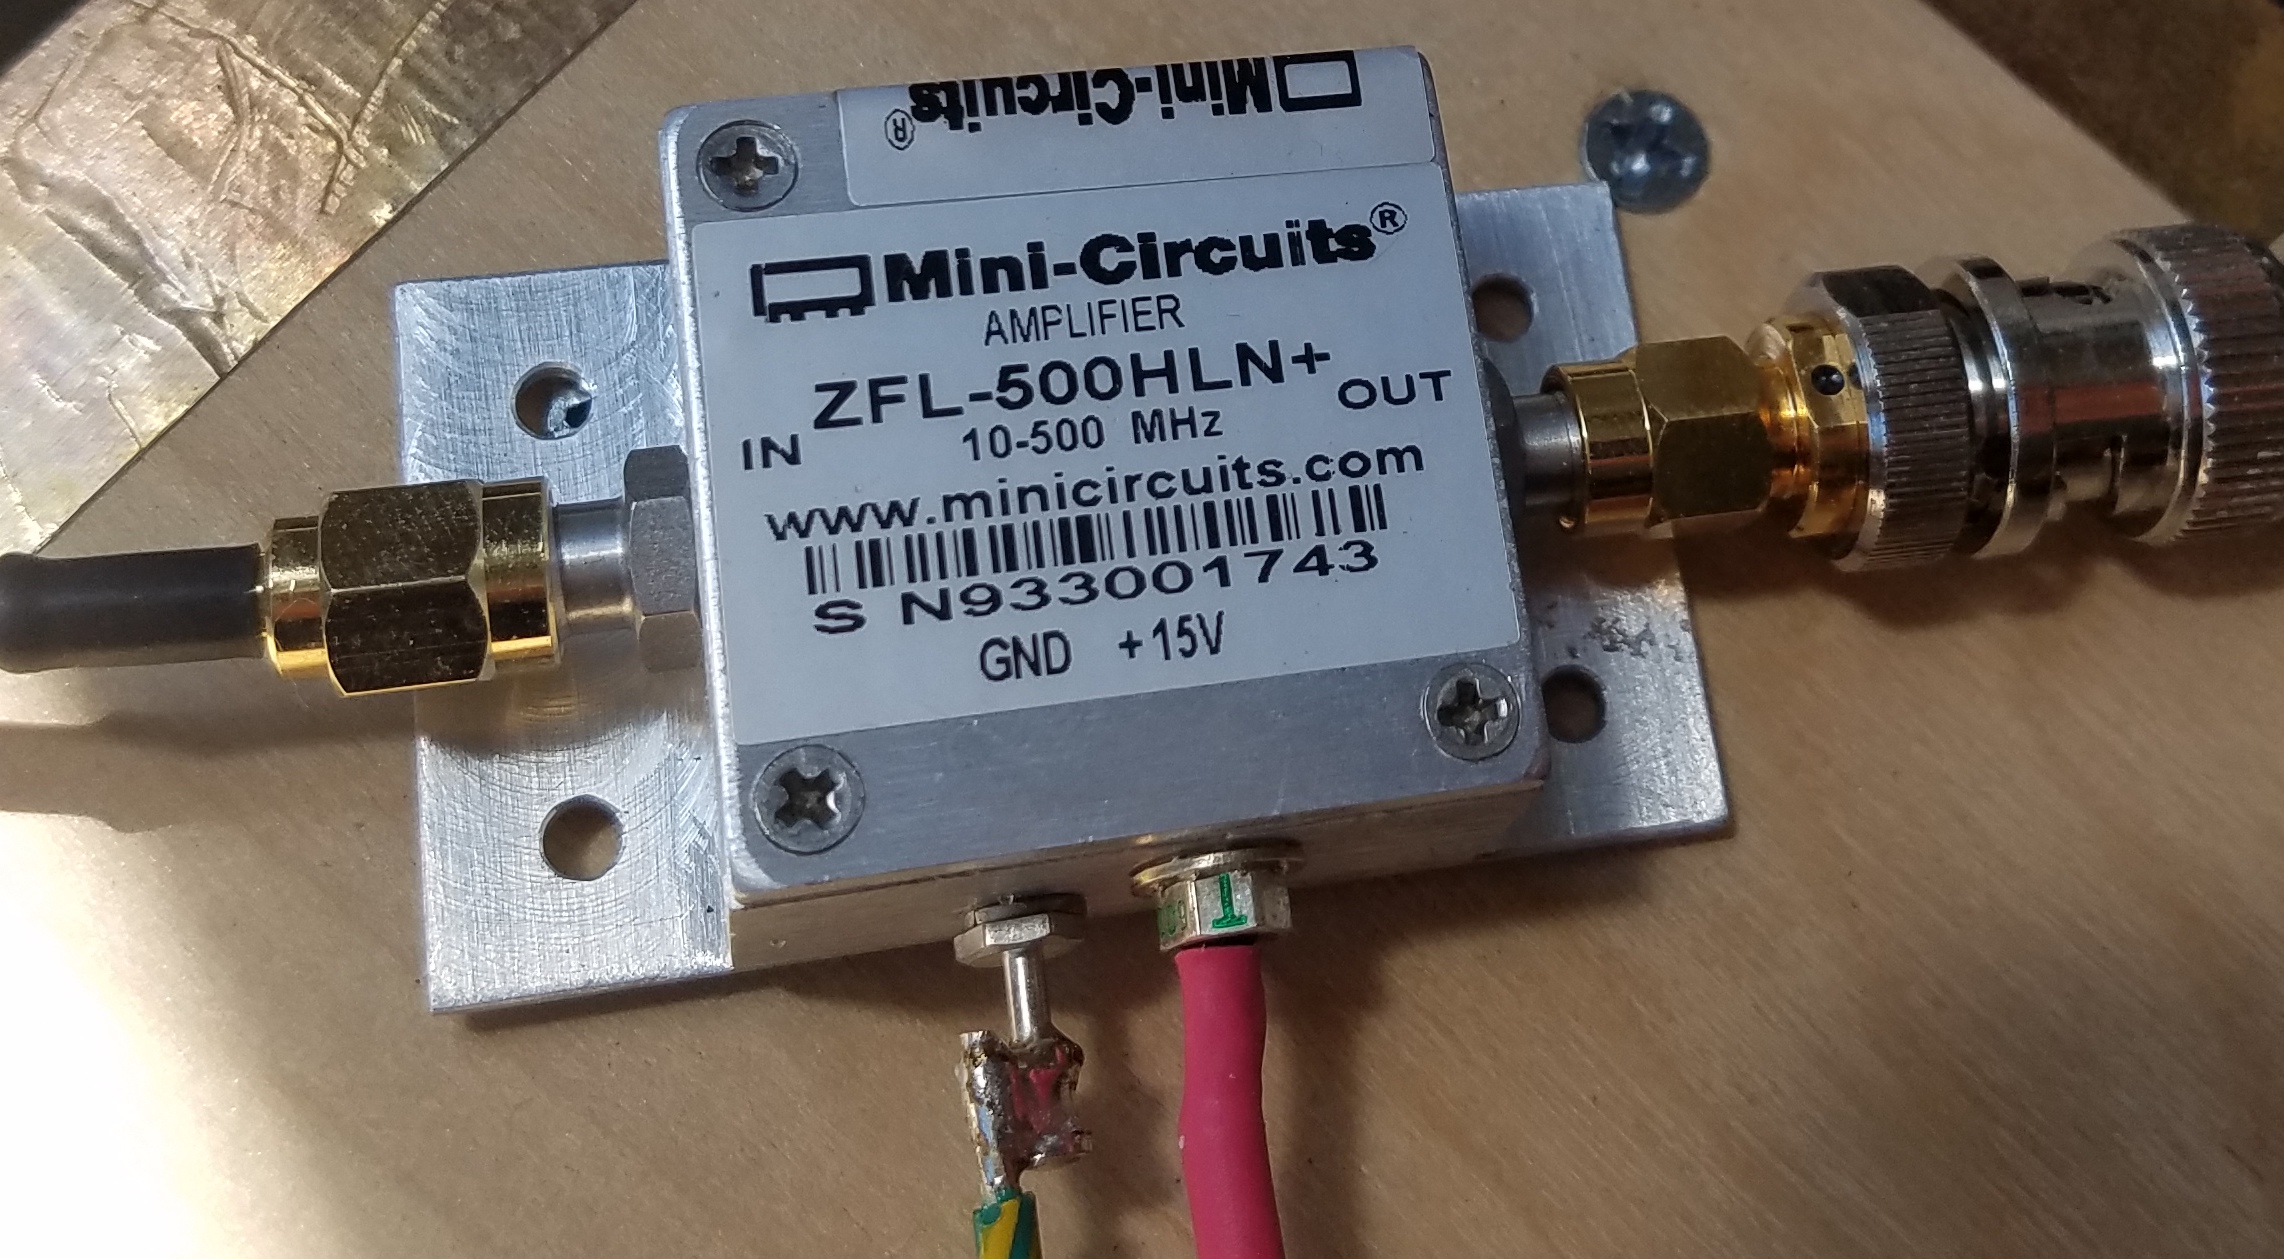
- A low-noise RF receive amplifier (Minicircuits ZFL-500HLN)
Block Diagram
The overall block diagram is shown below:
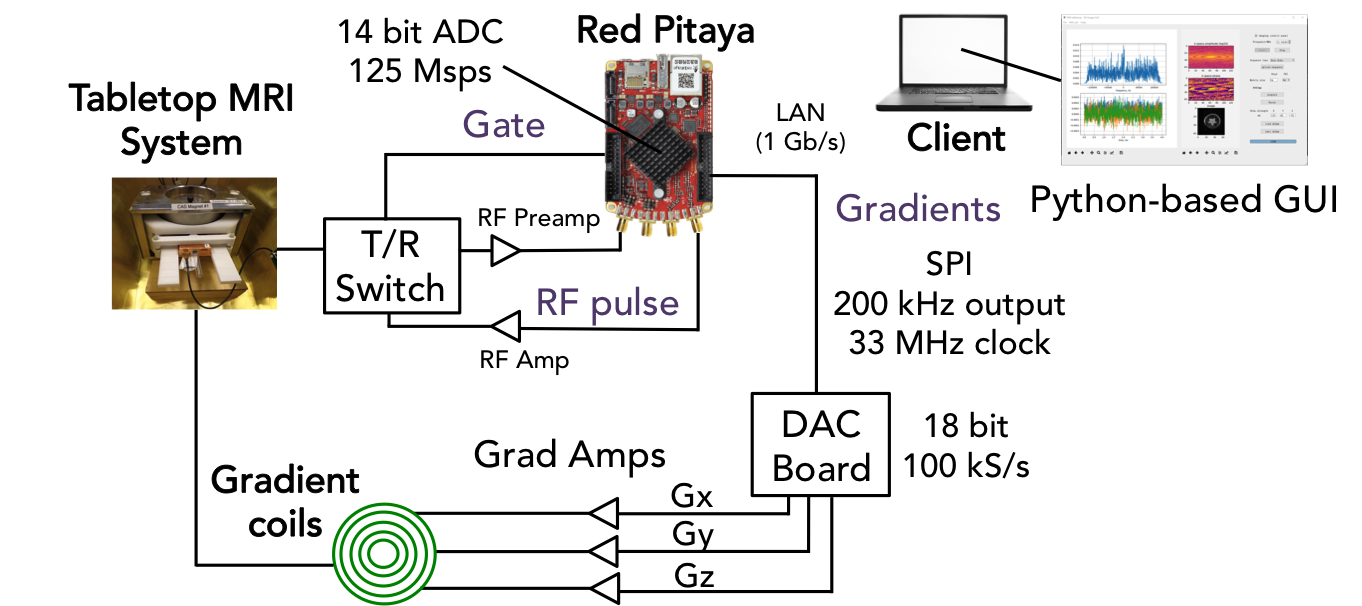
On the transmit side, there is also an attenuator (Minicircuits RCDAT-4000-120) before the excitation is sent to the coil.
This is to adjust the flip angle. On the receive side, there are two stages of amplification: first, the preamp (Gali-74+) on the T/R switch, then,
a low-noise RF amplifier (Minicircuits ZFL-500HLN).
Red Pitaya
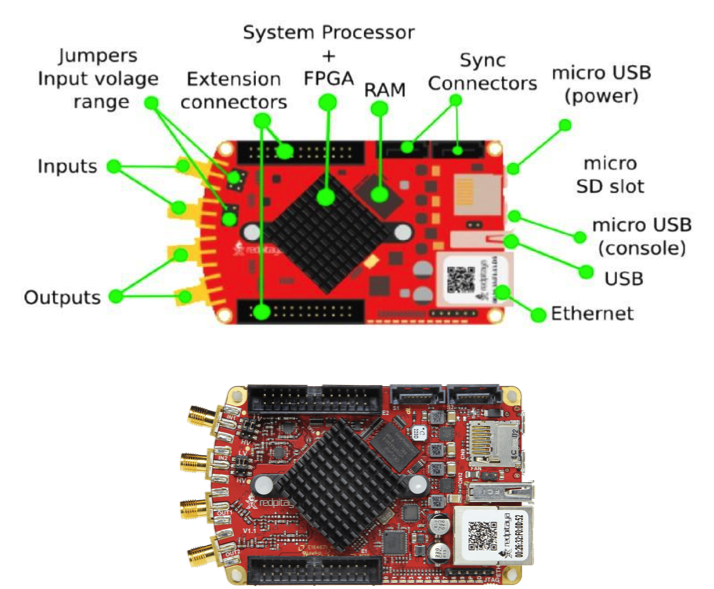
The Red Pitaya uses a Xilinx 7010 Zynq SoC, which is a board that contains a Xilinx FPGA, dual-core ARM CPU, and shared RAM. It is pictured here:
DAC Boards and GPA
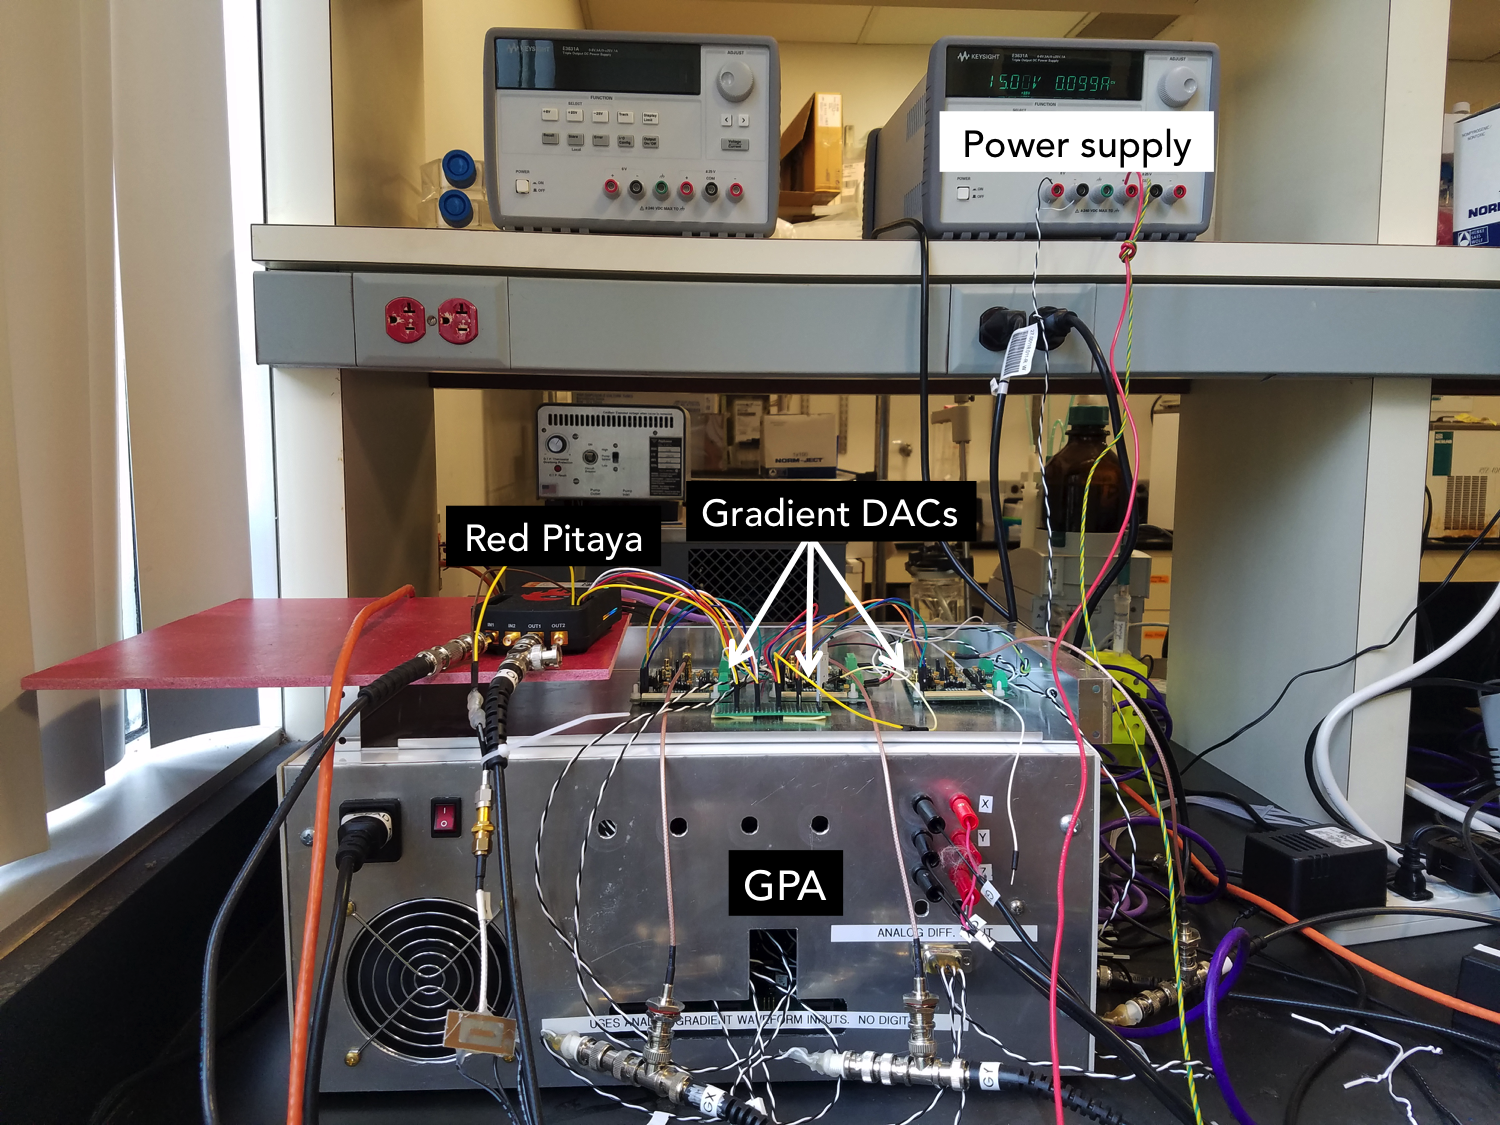
We generate the gradient waveforms digitally, then use 3 AD5780 18-bit DACs to convert the waveform to analog, and a custom built
gradient amplifier (GPA) from the Tabletop system. The GPA has been modified to take in analog inputs.
The gradient amplifier is pictured below. It is in the metal enclosure. The Red Pitaya and DAC boards sit on top of it. Finally, the 15V power supply is on the top shelf.
Attenuator and amplifier
These two components are not essential (it is possible to use a different attenuator and remove the second stage of amplification entirely).
However, the attenuator is a convenient way of calibrating the flip angle, and the amplifier boosts the received signal - we saw a two-fold increase in SNR. The amplifier is powered by a 15V power supply.
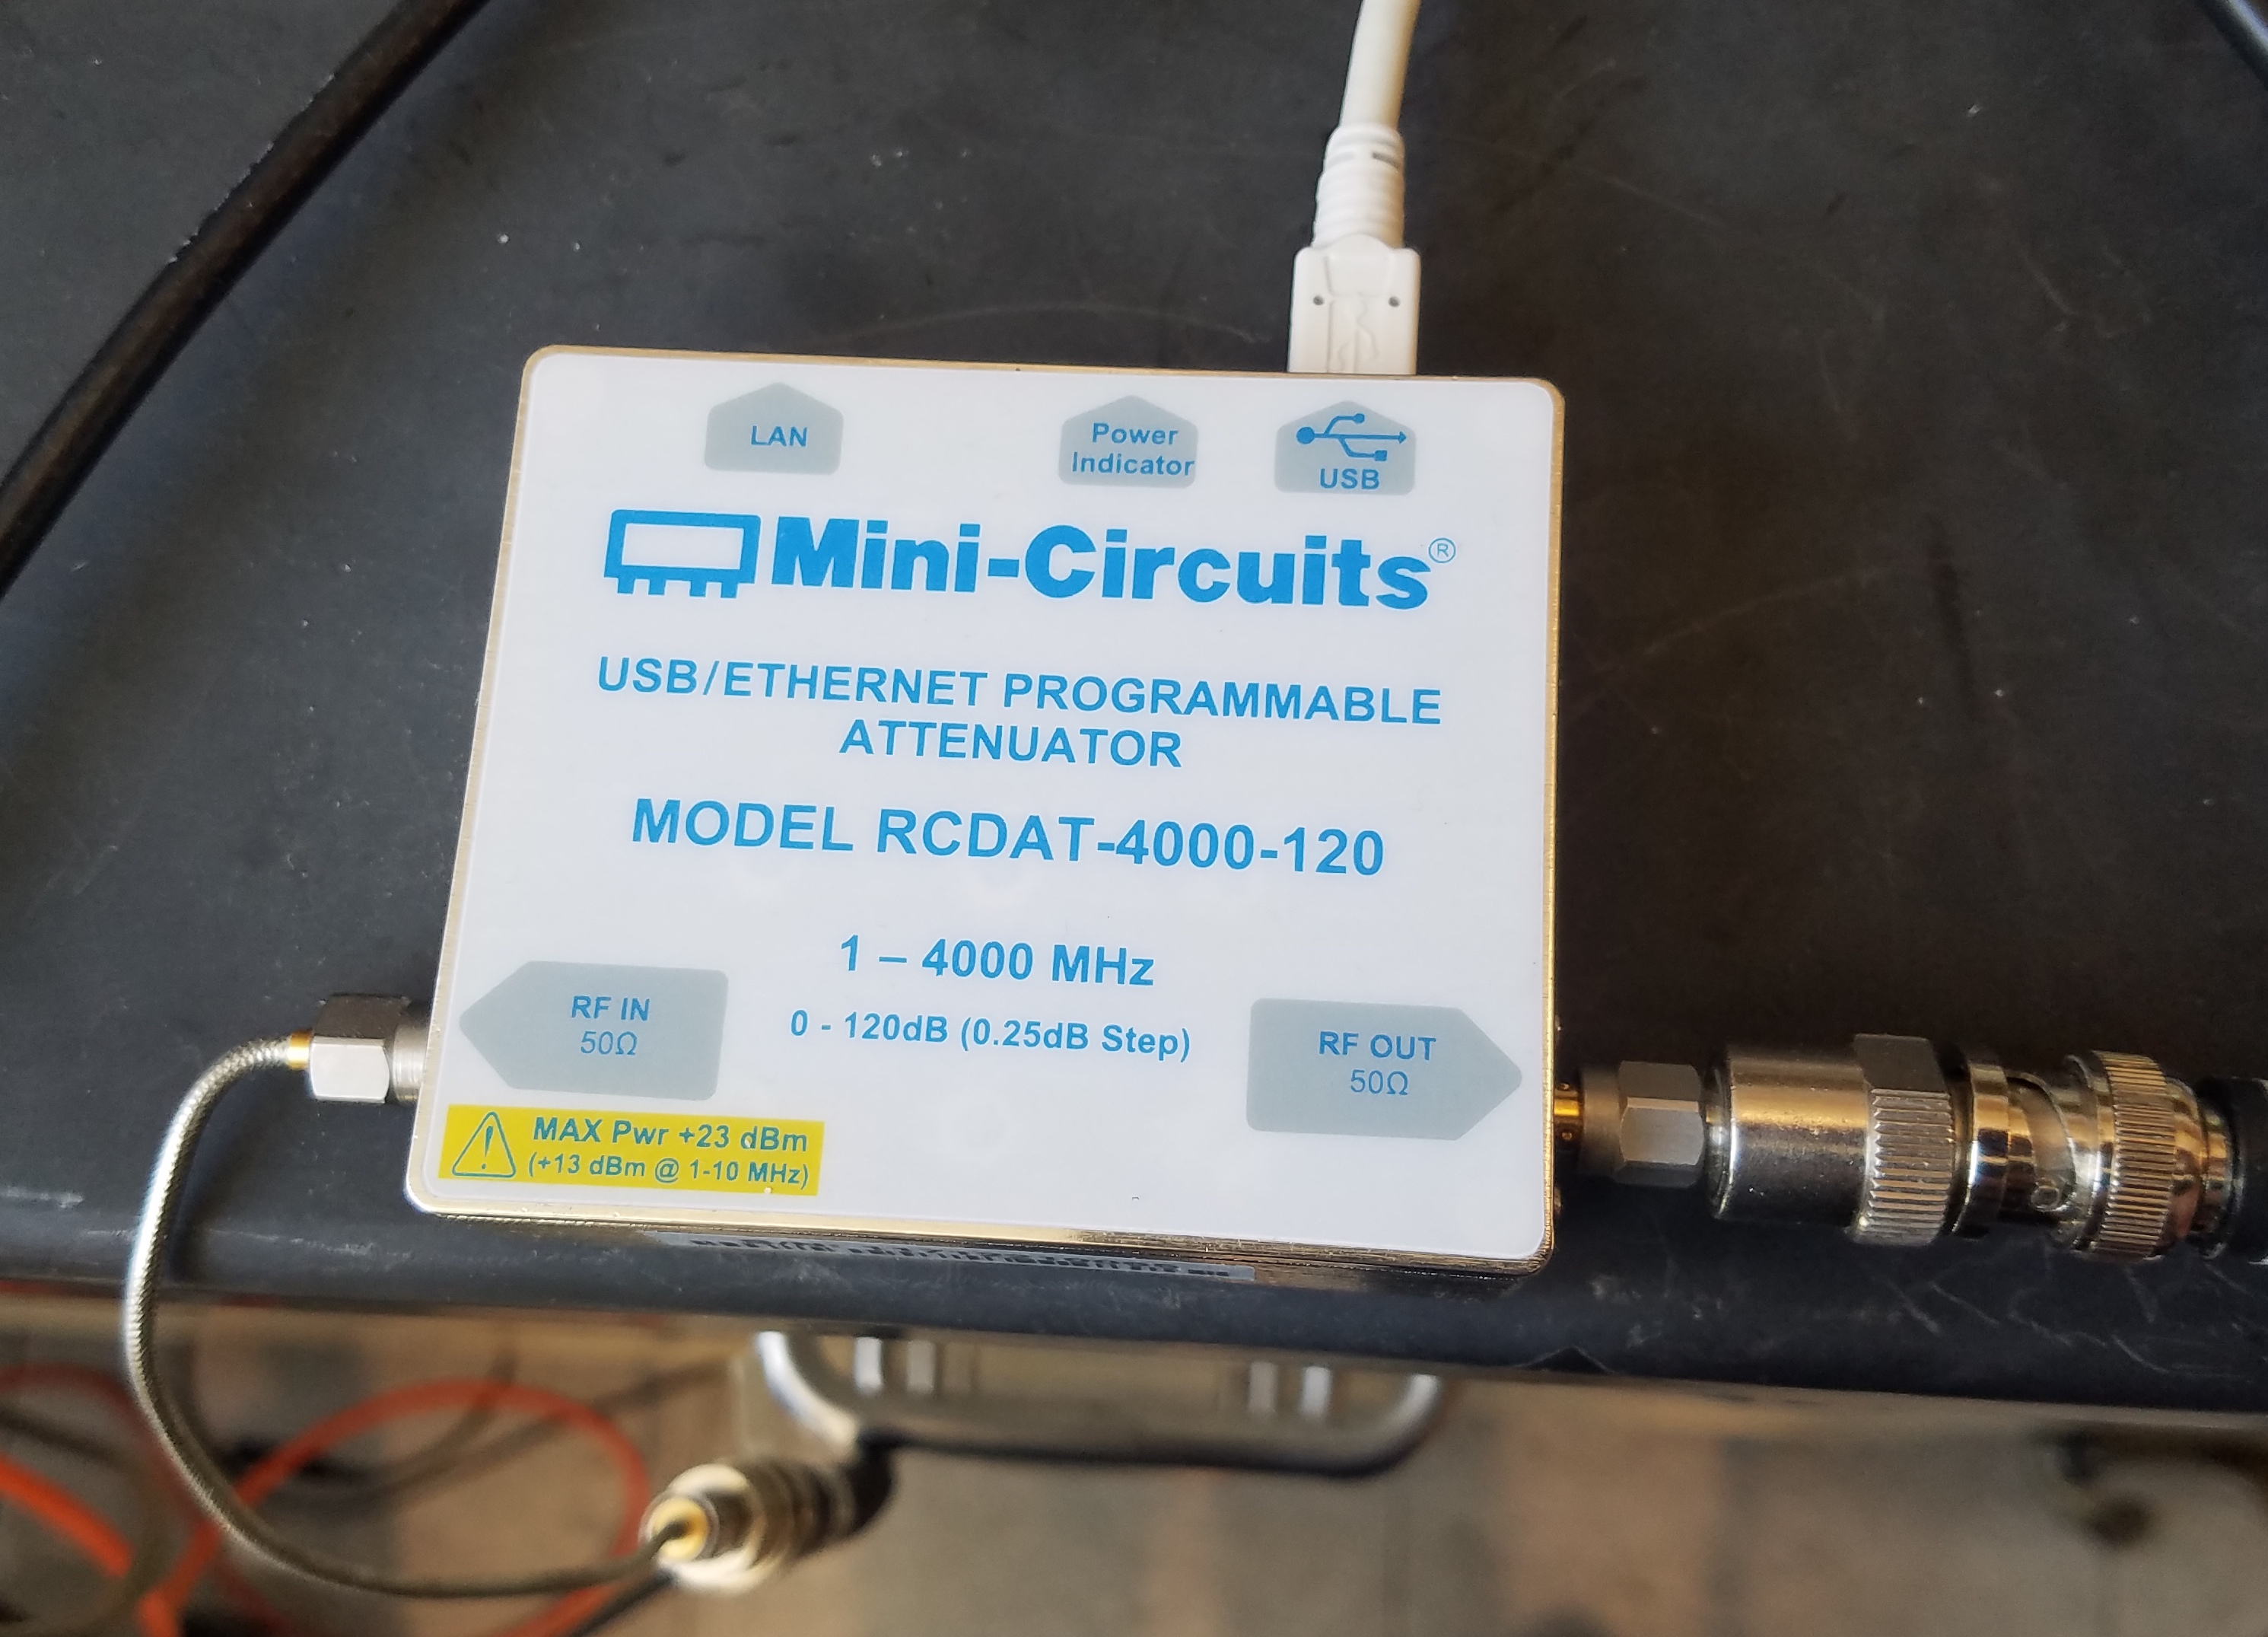
The attenuator requires software to control it, which can be downloaded from the Minicircuits site - download the “Full Software Package”. There is a GUI for Windows and a commandline interface with Linux. We have tested both. The GUI is more intuitive to use. The Linux commandline interface requires that you run:
./RUDAT [attenuation]
in the folder where the RUDAT binary is (RUDAT_CD_E0/Linux), where attenuation is the desired attenuation in dB. The program must be run as root. You may need to change the privileges if the program does not run successfully.
